When you’re looking at soot-stained walls, your first instinct might be to grab a wet rag and start scrubbing. This is one of the most common and costly mistakes homeowners make. Smoke residue is oily, and applying water prematurely will only smear the soot, embedding it deep into the paint and drywall and creating a much more permanent problem. Learning how to clean walls after smoke damage is all about following a specific, methodical process. This guide is here to help you avoid those pitfalls. We’ll show you how to properly remove all the loose soot first, choose the right cleaning solutions, and work systematically to restore your walls effectively.
Key Takeaways
- Start Dry, Not Wet: Your first move should always be removing loose soot with a dry-cleaning sponge or a HEPA vacuum. Using water or liquid cleaners too soon will only smear the greasy residue and push it deeper into your walls, creating a much bigger mess.
- Clean Systematically to Avoid Rework: Always test your cleaning solution on a hidden spot to prevent paint damage. Work from the ceiling down to the walls to control drips, and use a stain-blocking primer before painting to permanently seal away any leftover stains or odors.
- Know Your Limits and Your Options: A lingering smoke smell or widespread soot are signs that the damage is beyond a simple DIY fix. Before investing heavily in professional restoration, understand that selling your property as-is offers a direct path to move on without the stress and expense of repairs.
Before You Start: Essential Safety Precautions
Before you grab a sponge, it’s critical to focus on safety. I know you’re eager to make things feel normal again, but the residue left by a fire can be hazardous. Taking a few precautions will protect your health and prevent you from accidentally causing more damage. These steps are non-negotiable for keeping you safe while you work.
Gear Up: Your Must-Have Protective Equipment
The soot and smoke residue on your walls isn’t just messy—it can contain chemicals you don’t want on your skin or in your lungs. That’s why dressing for the job is your first priority. Always wear gloves, safety goggles, a long-sleeved shirt, and long pants to create a barrier between you and any harmful particles. Most importantly, wear a quality face mask, like an N-95 respirator, to protect your lungs from fine soot particles. This isn’t the time to skimp on personal protective equipment (PPE); your health is the most valuable thing in the room.
Let It Breathe: How to Properly Ventilate the Area
Your next move is to get the air moving. Open up all the windows and set up fans to push the stale, smoky air out and pull fresh air in. This will not only help reduce the lingering smoke smell but also minimize the concentration of airborne particles while you clean. Before you do anything else, make sure your home’s heating and cooling system (HVAC) is turned off. If you leave it running, the system can pull soot and smoke particles into the vents and spread them throughout the entire house, creating a much bigger problem for you to solve later.
Check for Hidden Dangers: Lead Paint and Structural Issues
What you see on the surface might not be the whole story. Cleaning smoke damage yourself can be tricky, and on porous materials like drywall or wallpaper, you could accidentally make the problem worse without the right tools. If your home was built before 1978, there’s also a chance of disturbing lead-based paint hidden under newer layers, which is a serious health hazard. Take a moment to look for signs of deeper issues, like warped walls or ceilings, which could indicate structural problems. If you see anything that makes you uneasy, it’s always best to pause and consider if this is a job you should handle alone.
Your Cleanup Toolkit: What You’ll Need
Before you roll up your sleeves, let’s talk about supplies. Cleaning smoke damage isn’t like your typical weekend tidying—it requires a specific set of tools and solutions to cut through the grime without making things worse. Having the right gear on hand from the start will make the process smoother and more effective. Think of this as your battle plan for banishing soot and smoke residue for good. Gathering everything you need first means you won’t have to stop mid-scrub to run to the store for something you forgot, which is the last thing you need when tackling a job this big.
Essential Tools and Equipment
Your first line of defense against loose soot is a vacuum with a HEPA filter. A HEPA vacuum is critical because it traps the tiny, harmful particles you’re trying to remove instead of just blowing them back into the air. When you vacuum, hold the nozzle just above the surface to lift the soot away without smearing it. Next, you’ll need a few dry-cleaning sponges, often called chemical or soot sponges. These are your secret weapon for lifting soot from walls, ceilings, and even lampshades before you introduce any liquid. They work dry and are designed to absorb residue without scrubbing it deeper into the surface.
The Best Cleaning Solutions for Smoke Damage
Once you’ve removed the dry soot, it’s time for a deeper clean. For a gentle but effective option, a simple solution of warm water and a degreasing dish soap can work wonders on oily soot. If you need something stronger, Trisodium Phosphate (TSP) is a powerful cleaner that’s very effective on stubborn smoke stains. You can find it at most hardware stores, but be sure to follow the safety instructions carefully, as it’s a strong chemical. Always wear gloves and eye protection when working with TSP. For a final wipe-down after cleaning, a diluted white vinegar solution can help neutralize any lingering odors on the surface.
Supplies for Testing Different Wall Types
Not all walls are created equal, and what works on painted drywall might damage plaster or wallpaper. Before you start washing an entire wall, you absolutely must test your cleaning solution on a small, hidden spot. Pick an area behind a piece of furniture or inside a closet where no one will see it. Apply a small amount of your chosen cleaner with a soft cloth, let it sit for a few minutes, and then wipe it away. Check for any paint lifting, discoloration, or damage to the wall’s texture. This simple step can save you from a massive headache and a much bigger, more expensive repair job down the line.
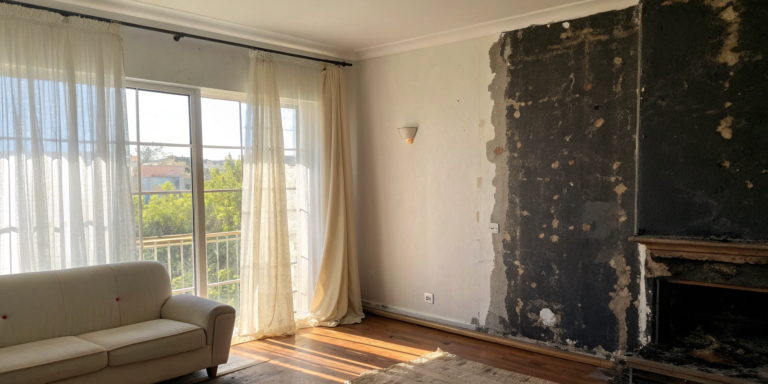
How to Clean Smoke and Soot From Walls: A Step-by-Step Guide
Tackling smoke and soot-covered walls is a serious undertaking, but with the right approach, you can make a significant impact. The key is to be methodical and patient. Rushing the process can smear the soot and embed it deeper into the paint and drywall, making your job much harder. Before you even think about scrubbing, you need to handle the loose residue. From there, a systematic cleaning process will help you restore your walls without causing more damage.
This guide breaks down the cleaning process into three manageable steps. By following this order, you’ll work more efficiently and avoid the common pitfalls that can turn a tough job into a nightmare. Remember to wear your protective gear and ensure the space is well-ventilated before you begin.
Step 1: Remove Loose Soot First
Before you introduce any liquids, your first goal is to get rid of all the loose soot. If you try to wipe or wash it away immediately, you’ll likely just smear the greasy residue across the wall, pushing it deeper into the surface. The best tool for this job is a vacuum with a HEPA filter and a brush attachment.
Hold the vacuum nozzle just slightly off the wall’s surface and move it gently over the soot. This lifts the particles without grinding them into the paint. Another effective tool is a dry-cleaning sponge, sometimes called a chemical sponge. These sponges are designed to pick up soot without water. Just be sure to use them completely dry and apply light, even pressure.
Step 2: Wash the Walls with a Cleaning Solution
Once you’ve removed the loose debris, it’s time to wash the walls. For light to moderate smoke damage, a simple solution of warm water and a grease-cutting dish soap can work wonders. For more stubborn, oily soot, you may need something stronger. A cleaner containing Trisodium Phosphate (TSP) is highly effective, but it’s a powerful chemical that can damage certain finishes.
No matter which cleaner you choose, always test it on a small, hidden spot first—like inside a closet or behind where a large piece of furniture will go. This ensures the solution won’t strip the paint or damage the wall itself. Apply the cleaner with a soft sponge, working in small, manageable sections.
Step 3: Work from the Top Down
This might sound counterintuitive, but you should always start with the ceiling first, then work your way down the walls. Soot and dirty water will inevitably drip, and this method ensures you aren’t cleaning the same area twice. When you start on the walls, begin at the top and clean downwards in sections. This simple technique prevents dirty streaks from running over the surfaces you’ve already cleaned, saving you time and frustration.
A two-bucket system can make this process even more effective. Keep one bucket filled with your cleaning solution and a second one with clean rinse water. After washing a section, rinse your sponge thoroughly in the clean water before dipping it back into the cleaning solution. This keeps your cleaning mix from getting contaminated with soot.
Removing Stubborn Stains Without Damaging Your Walls
After the initial cleaning, you’ll likely find some smoke and soot stains are particularly stubborn. It’s tempting to grab the strongest cleaner you can find and start scrubbing, but that can often do more harm than good. The key is to use the right techniques for your specific wall type to lift the stain without stripping paint or damaging the surface underneath. This part of the process requires patience and a bit of strategy, but getting it right means you won’t be creating a bigger repair job for yourself down the line. If the damage feels too overwhelming, remember that you have options. Our company offers a way to sell your home as-is without making any repairs.
How to Test Cleaners on a Small, Hidden Spot
This is a non-negotiable step. Before you apply any cleaning solution to your walls, you absolutely must test it. Find a small, out-of-the-way spot, like behind a piece of furniture or inside a closet. Apply a little bit of the cleaner with a cloth, let it sit for a few minutes, and then wipe it away according to the product’s instructions. Check for any discoloration, paint peeling, or other damage to the surface. This simple test can save you from a massive headache and costly repairs later on. It’s the best way to make sure your chosen cleaner is a friend, not a foe, to your walls.
Gentle Techniques for Different Wall Materials
Not all walls are created equal, and what works for one surface could ruin another. For dry, powdery soot on materials like drywall, your best tool is a special dry-chemical sponge. Gently wipe the wall in a downward motion, being careful not to scrub, which can grind the soot deeper into the surface. For waterproof surfaces like tile or glass, you can use wet cleaning methods, such as a high-alkali soap mixed with water. However, avoid using water on porous materials like unpainted wood or drywall, as it can cause swelling, water spots, and even more damage.
Common Mistakes That Can Make Damage Worse
When you’re eager to get your home back to normal, it’s easy to make mistakes that can set you back. One of the biggest is scrubbing too aggressively. This can spread the soot around and embed it deeper into the paint or drywall, making it nearly impossible to remove. Another common error is rushing the process. Cleaning smoke damage properly takes time and patience. Trying to do it all in one go can lead to missed spots and put your property and health at risk. Remember, cleaning without knowing the right way can cause more damage and expose you to harmful particles.
Finishing Touches: Restoring Walls and Eliminating Odors
After all the scrubbing and cleaning, you’re on the home stretch. This final stage is all about sealing in your hard work and making the room feel fresh and new again. It involves more than just a coat of paint; it’s about creating a barrier against any lingering stains and odors to ensure they don’t reappear down the line. Taking the time to prime, paint, and deodorize properly will make all the difference and help you finally close the chapter on the smoke damage.
How to Prime Walls After Cleaning
Think of primer as a crucial barrier between the cleaned wall and your new paint. Even after a deep clean, faint stains and smoky smells can get trapped in porous surfaces like drywall. A high-quality, stain-blocking primer is designed to lock these in for good. The American Red Cross suggests using a smoke-blocking primer to seal in any remaining odors or discoloration. Products specifically formulated for covering smoke damage, like Kilz or Zinsser, are excellent choices. Applying a thorough coat of primer ensures that stubborn soot stains won’t bleed through your new paint color, giving you a truly clean slate to work with.
Sealing and Repainting for a Fresh Start
Now for the most satisfying step: painting. The intensive cleaning process required for smoke removal is tough on walls and will almost certainly have stripped away some of the original paint. This is completely normal, so you should be ready with a new color. Applying a fresh coat of paint is the final seal that covers the primer and restores your walls to their former glory. It completes the visual transformation, making the space feel bright, clean, and renewed. Choose a quality interior paint and apply at least one, if not two, full coats to get a durable, even finish that will make the room feel like home again.
Getting Rid of That Lingering Smoke Smell
Sometimes, even after cleaning and painting, a faint smoky odor can linger in the air. Don’t get discouraged; this is common. The smell can get trapped in more than just the walls. To tackle this, you can place bowls of baking soda or activated charcoal around the room to absorb odors. For more persistent smells, ATI Restoration recommends using a commercial odor neutralizer. Running an air purifier with a HEPA filter can also help capture any remaining airborne particles. Continue to ventilate the area well by opening windows to cycle fresh air through the space until the last traces of the smoke smell are gone.
The Reality of DIY Cleanup: Common Challenges
Tackling smoke damage on your own can feel empowering, but it’s a job that comes with some serious hurdles. Before you commit, it’s important to understand the common challenges homeowners face. From stubborn materials that refuse to come clean to the hidden health risks involved, a DIY cleanup is often more complex than it first appears. Knowing what you’re up against can help you decide if this is a project you can realistically handle or if your time and energy are better spent on a different solution.
Dealing with Different Wall Materials and Finishes
Not all walls are created equal, especially when it comes to cleaning smoke damage. Porous surfaces like drywall, wallpaper, and unsealed wood can absorb soot and odors deep within, making them incredibly difficult to clean completely. You might find that scrubbing only pushes the soot further into the material. Each surface in your home, from painted walls to wood trim, requires a specific cleaning method and solution. Using the wrong technique can easily lead to permanent stains, discoloration, or damage, turning a cleaning project into a costly repair job.
Understanding the Health Risks and Time Commitment
Your well-being should always come first, and smoke damage cleanup poses real health risks. Soot isn’t just dirt; it’s a collection of fine, toxic particles that can be inhaled or absorbed through the skin. Exposure can lead to serious respiratory issues and other health problems. Beyond the safety concerns, this is not a quick weekend project. Properly cleaning an entire room, let alone a whole house, requires a significant amount of time and physical effort. Rushing the process can compromise both your health and the final result, leaving you in a worse position than when you started.
Warning Signs That the Job Isn’t Done
How do you know when your DIY cleanup isn’t cutting it? One of the biggest signs is a lingering smoke odor that just won’t go away, even after multiple cleanings. This often means soot particles are still trapped in hidden areas or porous materials. Other red flags include persistent stains that reappear after drying or a sticky, greasy film that remains on surfaces. If you find the damage is widespread or you’re just not seeing results, it’s a strong indicator that the problem is beyond a simple surface clean. In these cases, continuing on your own could risk incomplete soot removal and ongoing air quality issues.
When Is It Time to Call for Help?
It’s completely understandable to want to roll up your sleeves and start cleaning right after a fire. Taking action can feel like reclaiming control in a chaotic situation. But sometimes, the scope of the damage is much larger than it appears on the surface. Knowing when to pause and call for professional help is not admitting defeat—it’s making a smart, safe decision for you and your home. Pushing forward with a DIY cleanup on extensive damage can often lead to bigger problems and more expenses down the road. Before you get too deep into the work, it’s crucial to honestly assess whether this is a job you can, or should, handle on your own.
Signs the Damage Is Too Extensive for DIY
A little bit of soot on a single wall might be manageable, but fire damage is rarely that simple. It’s time to call in professionals if you see widespread issues. For instance, if heavy soot residue covers large areas or multiple rooms, a simple sponge and cleaner won’t be enough. This kind of deep contamination requires specialized equipment to remove safely. Pay close attention to porous materials like drywall, unsealed wood, and insulation. If smoke and soot have penetrated these surfaces, you’ll likely need professional intervention to prevent permanent damage and lingering odors. When the job looks more like a full-scale restoration than a weekend cleaning project, it’s a clear sign that it’s out of DIY territory.
Red Flags That Point to a Bigger Problem
Some of the most serious fire damage isn’t visible at first glance. One of the biggest red flags is potential contamination of your home’s HVAC system. Soot and smoke particles can easily travel through your air ducts, spreading contaminants to every room in the house, even those that seem untouched. Turning on your heat or AC could make the problem much worse. Another major concern is structural integrity. What looks like surface-level charring could be hiding damage to wall studs or ceiling joists. Without a professional assessment, you can’t be sure the structure is safe. These hidden issues are why a DIY approach can be so risky; you might be cleaning the surface while ignoring a much deeper, more dangerous problem.
Weighing the Cost of Restoration vs. Selling As-Is
Facing a massive cleanup often brings homeowners to a crossroads: Is it worth investing the time, money, and emotional energy into a full restoration? Hiring a professional fire restoration company is expensive, and the costs can quickly add up beyond the initial quote, especially if they uncover structural or system-wide problems. You have to weigh the final cost of repairs against the home’s post-restoration value, all while dealing with the stress of the process. For many, this is the point where considering an alternative makes sense. Selling your home as-is provides a way out from under the weight of repairs. Companies that specialize in fire-damaged properties offer a streamlined process that allows you to get a fair cash offer and move forward without managing contractors or living in a construction zone.
Related Articles
- Smoke Damage Home: Your Complete Guide
- Can You Clean Smoke Damage Yourself? A DIY Guide
- 5 Things That Can Be Salvaged After a Fire
- How to Clean Up After a House Fire: A Guide
- Smoke Damage 101: A Complete Homeowner’s Guide
Frequently Asked Questions
Can I just paint over the smoke stains to save time? I know it’s tempting to look for a quick fix, but painting directly over soot is a mistake that will cost you more time and money later. Soot is oily and will eventually bleed through the new paint, leaving you with ugly, discolored patches. You have to thoroughly clean the surface and then apply a stain-blocking primer first. The primer creates a seal that prevents any remaining residue or odors from getting through, giving you a truly fresh surface for your new paint.
What if the smoky smell still won’t go away after I’ve cleaned everything? A lingering smoke smell is one of the most frustrating parts of fire damage cleanup. If the odor persists after you’ve cleaned, primed, and painted, it usually means smoke particles have penetrated porous materials like drywall, insulation, or even wood framing. The smell might also be trapped in your HVAC system. At this point, surface cleaning won’t solve the problem, and you may be dealing with a much deeper issue that requires professional attention.
Why can’t I just use a wet rag to wipe the soot off the walls? Using water or a wet cleaner as your first step will turn a dusty problem into a greasy, smeared mess. Soot particles are oily, and when you add liquid, you essentially grind them deeper into the paint and drywall, making them much harder to remove. Always start by lifting the loose, dry soot with a HEPA vacuum or a special dry-cleaning sponge. This removes the bulk of the residue so you can effectively wash what’s left behind.
Is it really necessary to wear all that protective gear? Yes, absolutely. This isn’t about avoiding a little dirt; it’s about protecting your health. Soot contains fine toxic particles that can cause serious respiratory problems if you breathe them in. The residue can also irritate your skin. Wearing an N-95 respirator, gloves, and goggles creates a necessary barrier that keeps those harmful particles out of your body while you work.
How do I decide if I should clean it myself or just sell the house? This decision really comes down to the scale of the damage and your own capacity to handle the project. If the damage is contained to a small area and you feel confident in the process, a DIY cleanup might be manageable. However, if you’re facing widespread soot, a persistent smoke odor, or signs of structural issues, the time, cost, and stress of restoration can be overwhelming. Selling as-is is a practical alternative if you want to move forward quickly without taking on a massive and potentially hazardous repair project.